Recovering your Windows 10 password with the all new iSeePassword Windows Password recovery software is extremely simple and easy to do. The software can be used for recovering password of not only Windows 10, but also of Windows 2000, Windows XP, Windows Vista, Windows 8.1 and Windows 7.
The Windows Password recovery tool from iSeePassword is an extremely popular one, that lends a helping hand to all those who seem to have forgotten the password they set for their Windows OS. The software allows the administrator to recover the password with a bootable CD or DVD, and even a bootable USB drive of Pen Drive.
There are primarily four steps associated with the Windows password recovery:
- Downloading and installing the iSeePassword Windows Password recovery software
- Creating a new password recovery disk with a USB drive, CD or DVD
- Boot the computer using the flash drive or the CD/DVD
- Reset password and gain access to your system
The entire password recovery process requires two very important and easily accessible things. They are:
- A writable USB flash drive or a writable DVD or CD (of at least 2GB capacity)
- A different computer for accessing with administrator privileges
Now let us go through the recovery steps one by one to reset Windows 10 password, and try to understand what exactly needs to be done. Read on to find out more.
Step #1 – Download and install the iSeePassword Windows Password recovery software
You can quite easily download the Windows Password recovery and install it on any computer you might have access to. The computer might have any system running, such as 2000, XP, Vista, 7, 8.1 and 10. The software will work on these systems.
It is a given for all users to run the installation as administrator for any Windows OS version. The option can be found in the drop down list by right clicking the EXE installation file. This would allow the installation process to be even smoother.
Step #2 – Creating a new password recovery disk with a USB drive, CD or DVD
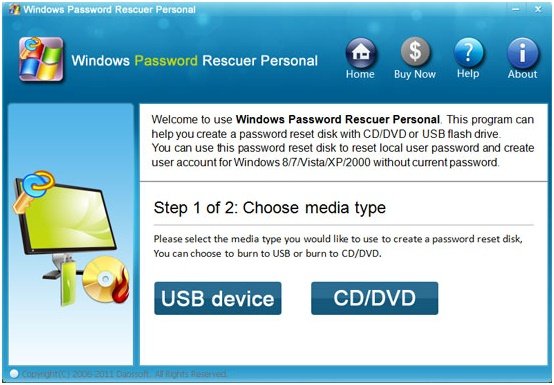
The second step basically involves you creating a bootable password recovery disk with either a USB flash drive or a CD/DVD. The steps to do that are as follows:
- Choose any one option, either USB or CD/DVD
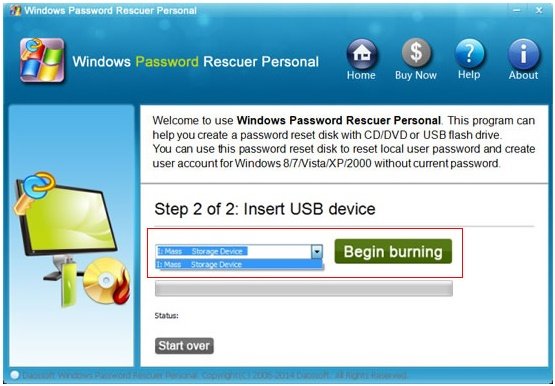
- Insert the USB device or the CD/DVD. Select the drive or disk you inserted and select BEGIN BURNING to burn the password recovery disk
- When the burn process has been completed successful, your need to click on OK and use the drive or disk to recover your password.
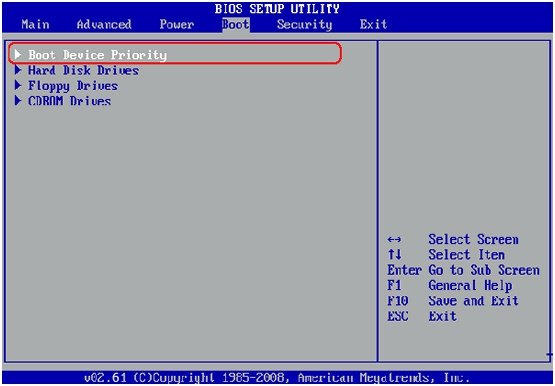
Step #3 – Boot the computer using the flash drive or the CD/DVD
You need to use this drive or disk to boot your computer. Simply enter your motherboard bios by pressing F9 when your computer boots, and change boot device priority to the drive or disk. The system will save the settings and restart, and you will be ready to recover your password.
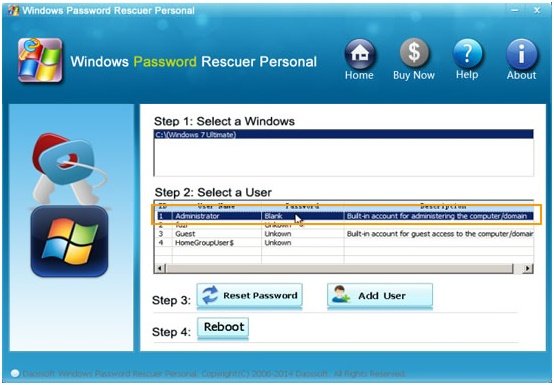
Step #4 – Reset password and gain access to your system
When your computer boots from the USB drive or CD/DVD, Windows Password recovery will open a window for password recovery
Select your Windows system, or the administrator system for which you require password recovery, then choose the target user from the user list to reset the user password. When the reset is done, the space given for the password will be blank. Click on REBOOT to change boot settings from the BIOS and restart to gain unrestricted access.