wp:paragraph
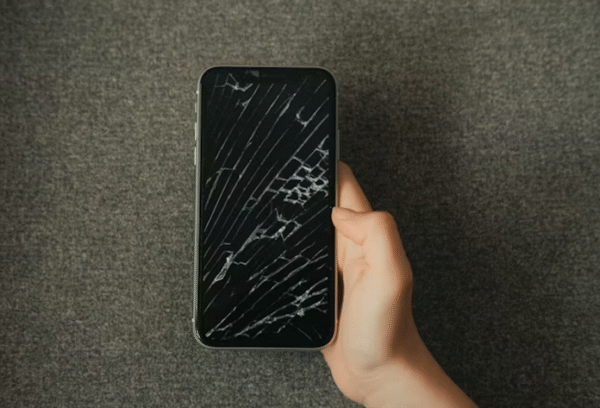
Suddenly losing a video on an iPhone can make the heart skip a beat. Videos, unlike pictures, register dynamic moments: a child’s milestone, a party, an important presentation, or just an ordinary day in one’s life.
/wp:paragraph
wp:paragraph
As these moving memories disappear, the feeling of immense loss is very heavy. In an instant, one starts to question, “Can I recover deleted videos from my iPhone?”
/wp:paragraph
wp:paragraph
In many instances, the comforting answer is a big yes; there are, in fact, some alternatives to retrieving them, even if it looks as if they have been permanently deleted from a device.
/wp:paragraph
wp:image {“id”:54811,”sizeSlug”:”full”,”linkDestination”:”media”,”align”:”center”}
/wp:image
wp:paragraph
Data recovery retrieves “deleted” files (like videos) that still exist invisibly on your storage. Specialized software scans the iPhone’s memory, locates these residual fragments, and reconstructs them before new data overwrites them permanently.
/wp:paragraph
wp:paragraph
Speed is critical. This article serves as your essential guide, outlining five effective approaches for how to recover deleted videos from iPhone to significantly enhance your chances for iPhone video recovery.
/wp:paragraph
wp:heading
Method 1: Harnessing Specialized iPhone Data Recovery Software (e.g., Gbyte Recovery)
/wp:heading
wp:paragraph
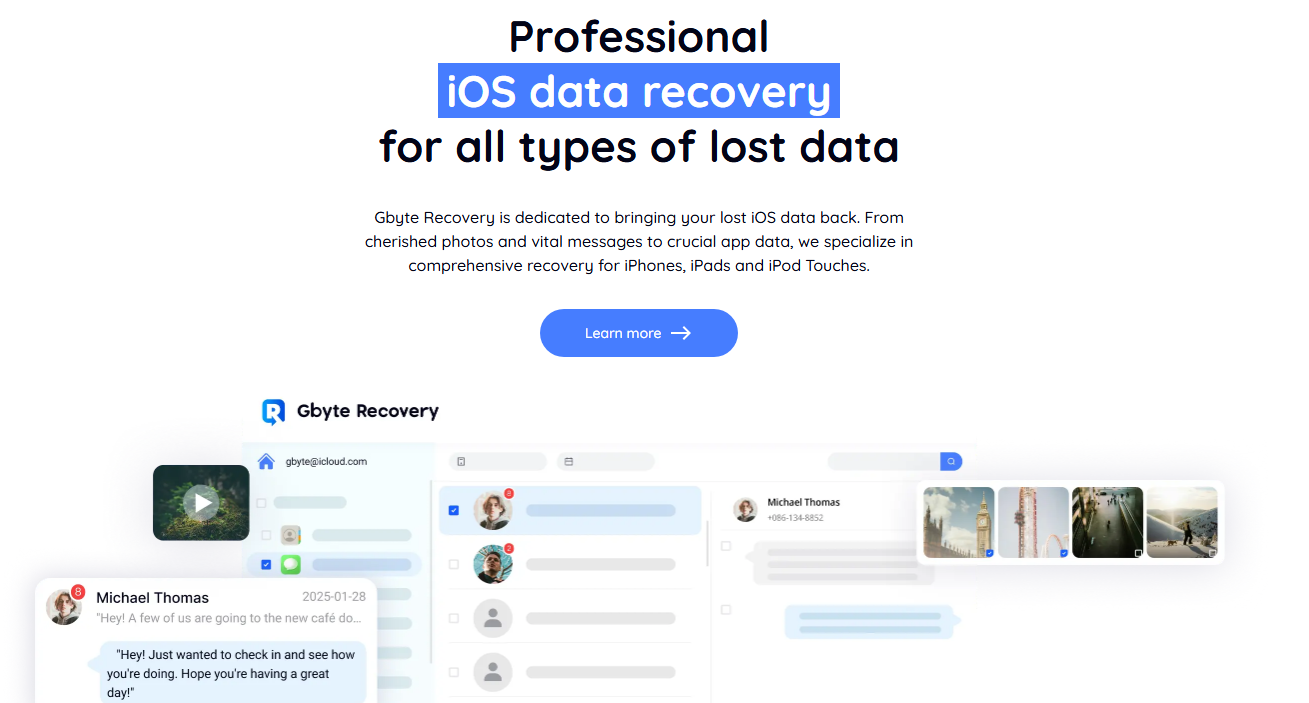
When videos are no longer found in the “Recently Deleted” album, and traditional backup restoration isn’t a viable option (perhaps due to potential data overwrite or lack of a suitable backup), specialized iPhone data recovery software like Gbyte Recovery becomes an invaluable resource.
/wp:paragraph
wp:paragraph
It enables you to probe deeper into your device’s storage. Gbyte’s purpose is to identify and retrieve data that has become inaccessible through conventional means.
/wp:paragraph
wp:image {“id”:54814,”width”:”700px”,”sizeSlug”:”full”,”linkDestination”:”media”,”align”:”center”}
/wp:image
wp:heading {“level”:3}
Key Advantages of Professional Recovery Tools:
/wp:heading
wp:list
- wp:list-item
- Profound Scan Capabilities: Such software can conduct thorough scans of your iPhone’s internal storage. This capability allows them to uncover fragmented video data that might still remain, even after the video has been logically deleted.
- Targeted Recovery with Preview: A notable benefit is the ability to preview recoverable files. You can meticulously select only the specific videos you need. This avoids the requirement for a complete device restoration, thereby preserving your current phone data.
- Secure Recovery Process: These tools typically save recovered data to your computer. They do not write new data onto your iPhone during the recovery operation. This design significantly mitigates the risk of any further data corruption.
- Intuitive User Experience: Many professional tools are crafted for ease of use. They guide you through each step of the recovery process. This ensures that even individuals without extensive technical knowledge can perform advanced data retrieval.
- Multi-Data Type Support: While this guide focuses on video recovery, comprehensive iPhone data recovery utilities often support the retrieval of diverse data types. This includes assisting you to retrieve deleted text messages on iPhone, restoring contacts, photos, and even content from messaging apps like WhatsApp, enhancing their utility across various data loss scenarios.
/wp:list-item
wp:list-item
/wp:list-item
wp:list-item
/wp:list-item
wp:list-item
/wp:list-item
wp:list-item
/wp:list-item
/wp:list
wp:heading {“level”:3}
Steps to Recover Videos with Gbyte Recovery (Example for Cloud-Based Scan):
/wp:heading
wp:list {“ordered”:true}
- wp:list-item
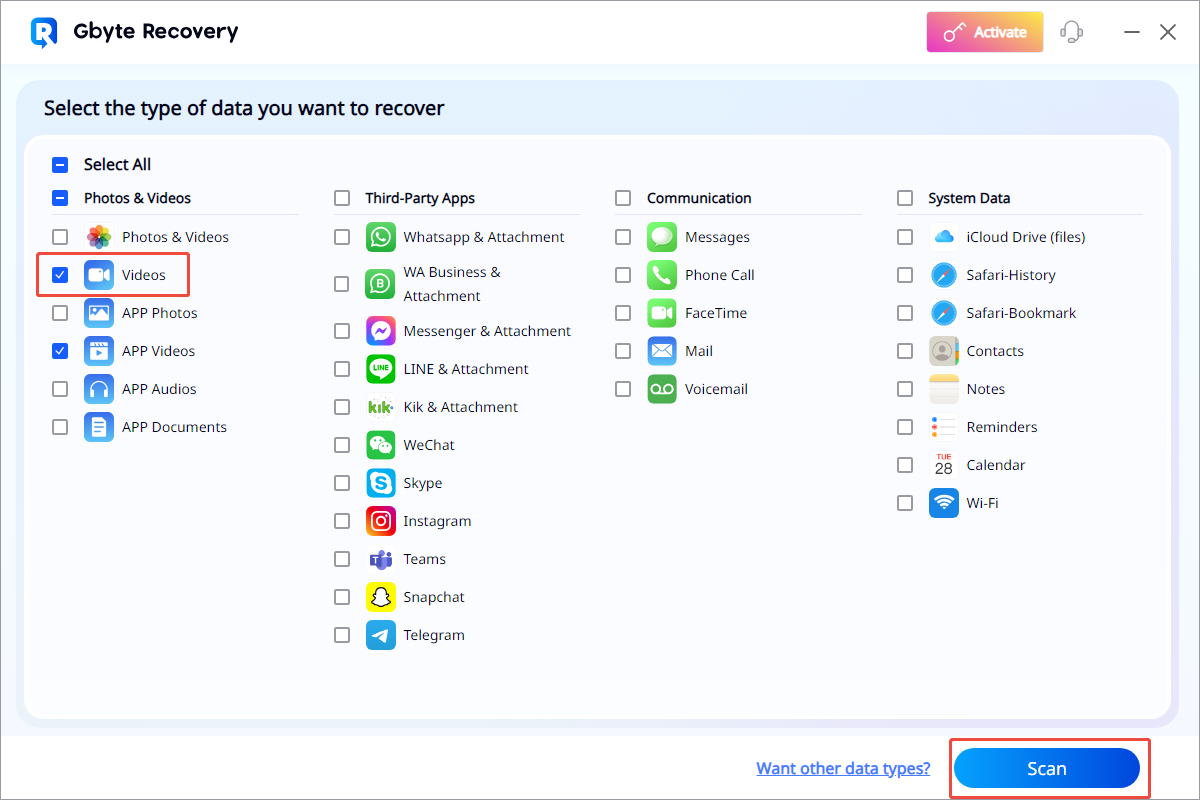
- Acquire & Install: Download Gbyte Recovery from its official website. Proceed with installation on your computer (either Windows or macOS).
- Select Data & Initiate Scan: Launch the application. Choose the specific data type you wish to recover (e.g., Videos) for a scan linked to your Apple ID. Click “Scan.”
/wp:list-item
wp:list-item
/wp:list-item
/wp:list
wp:image {“id”:54813,”width”:”700px”,”sizeSlug”:”full”,”linkDestination”:”media”,”align”:”center”}
/wp:image
wp:list {“ordered”:true,”start”:3}
- wp:list-item
- Secure Login: Safely enter your Apple ID credentials. Then, click the “Enter” logo to grant access to your cloud-stored data for the scanning process.
- Review & Choose: Upon scan completion, Gbyte Recovery will present the recoverable videos. You can preview these files to verify they are the ones you intend to retrieve.
- Save to Computer: Select your desired videos from the displayed list. Click “Recover to PC.” The chosen videos will then be securely saved into a designated folder on your computer.
/wp:list-item
wp:list-item
/wp:list-item
wp:list-item
/wp:list-item
/wp:list
wp:paragraph
Prompt action when utilizing specialized software such as Gbyte Recovery is paramount. Your iPhone constantly writes new data. This continuous activity can overwrite existing “deleted” video data. Initiating a scan sooner rather than later significantly improves your prospects for a successful recovery.
/wp:paragraph
wp:heading
Method 2: Explore Cloud Sync Services (iCloud Photos, Google Photos, etc.)
/wp:heading
wp:paragraph
Many iPhone users leverage additional cloud services for syncing their videos. These can include iCloud Photos (which operates distinctly from iCloud Backup), Google Photos, Dropbox, or OneDrive. It’s plausible that your deleted videos might still reside within one of these platforms.
/wp:paragraph
wp:heading {“level”:3}
Steps:
/wp:heading
wp:list {“ordered”:true}
- wp:list-item
- Check iCloud.com Photos: Visit iCloud.com from any web browser. Log in with your Apple ID. Click the Photos icon and inspect both the main photo library and the “Recently Deleted” folder there.
- Check Third-Party Services: Log directly into your Google Photos, Dropbox, or OneDrive account through their web interface or dedicated app. Look within their respective “Trash,” “Bin,” or “Recently Deleted” folders. These companies typically retain deleted items for a longer period (e.g., Google Photos retains them for 60 days).
/wp:list-item
wp:list-item
/wp:list-item
/wp:list
wp:paragraph
If you use various cloud services to keep track of your videos, then this is an easier way of recovering them.
/wp:paragraph
wp:heading
Method 3: Restore from iCloud or iTunes/Finder Backups
/wp:heading
wp:paragraph
If you consistently back up your iPhone, either to iCloud or to your computer via iTunes or Finder, you might be able to restore deleted videos from an earlier backup. This remains a traditional approach to recovering deleted iPhone videos.
/wp:paragraph
wp:heading {“level”:3}
Steps to Restore from iCloud Backup:
/wp:heading
wp:list {“ordered”:true}
- wp:list-item
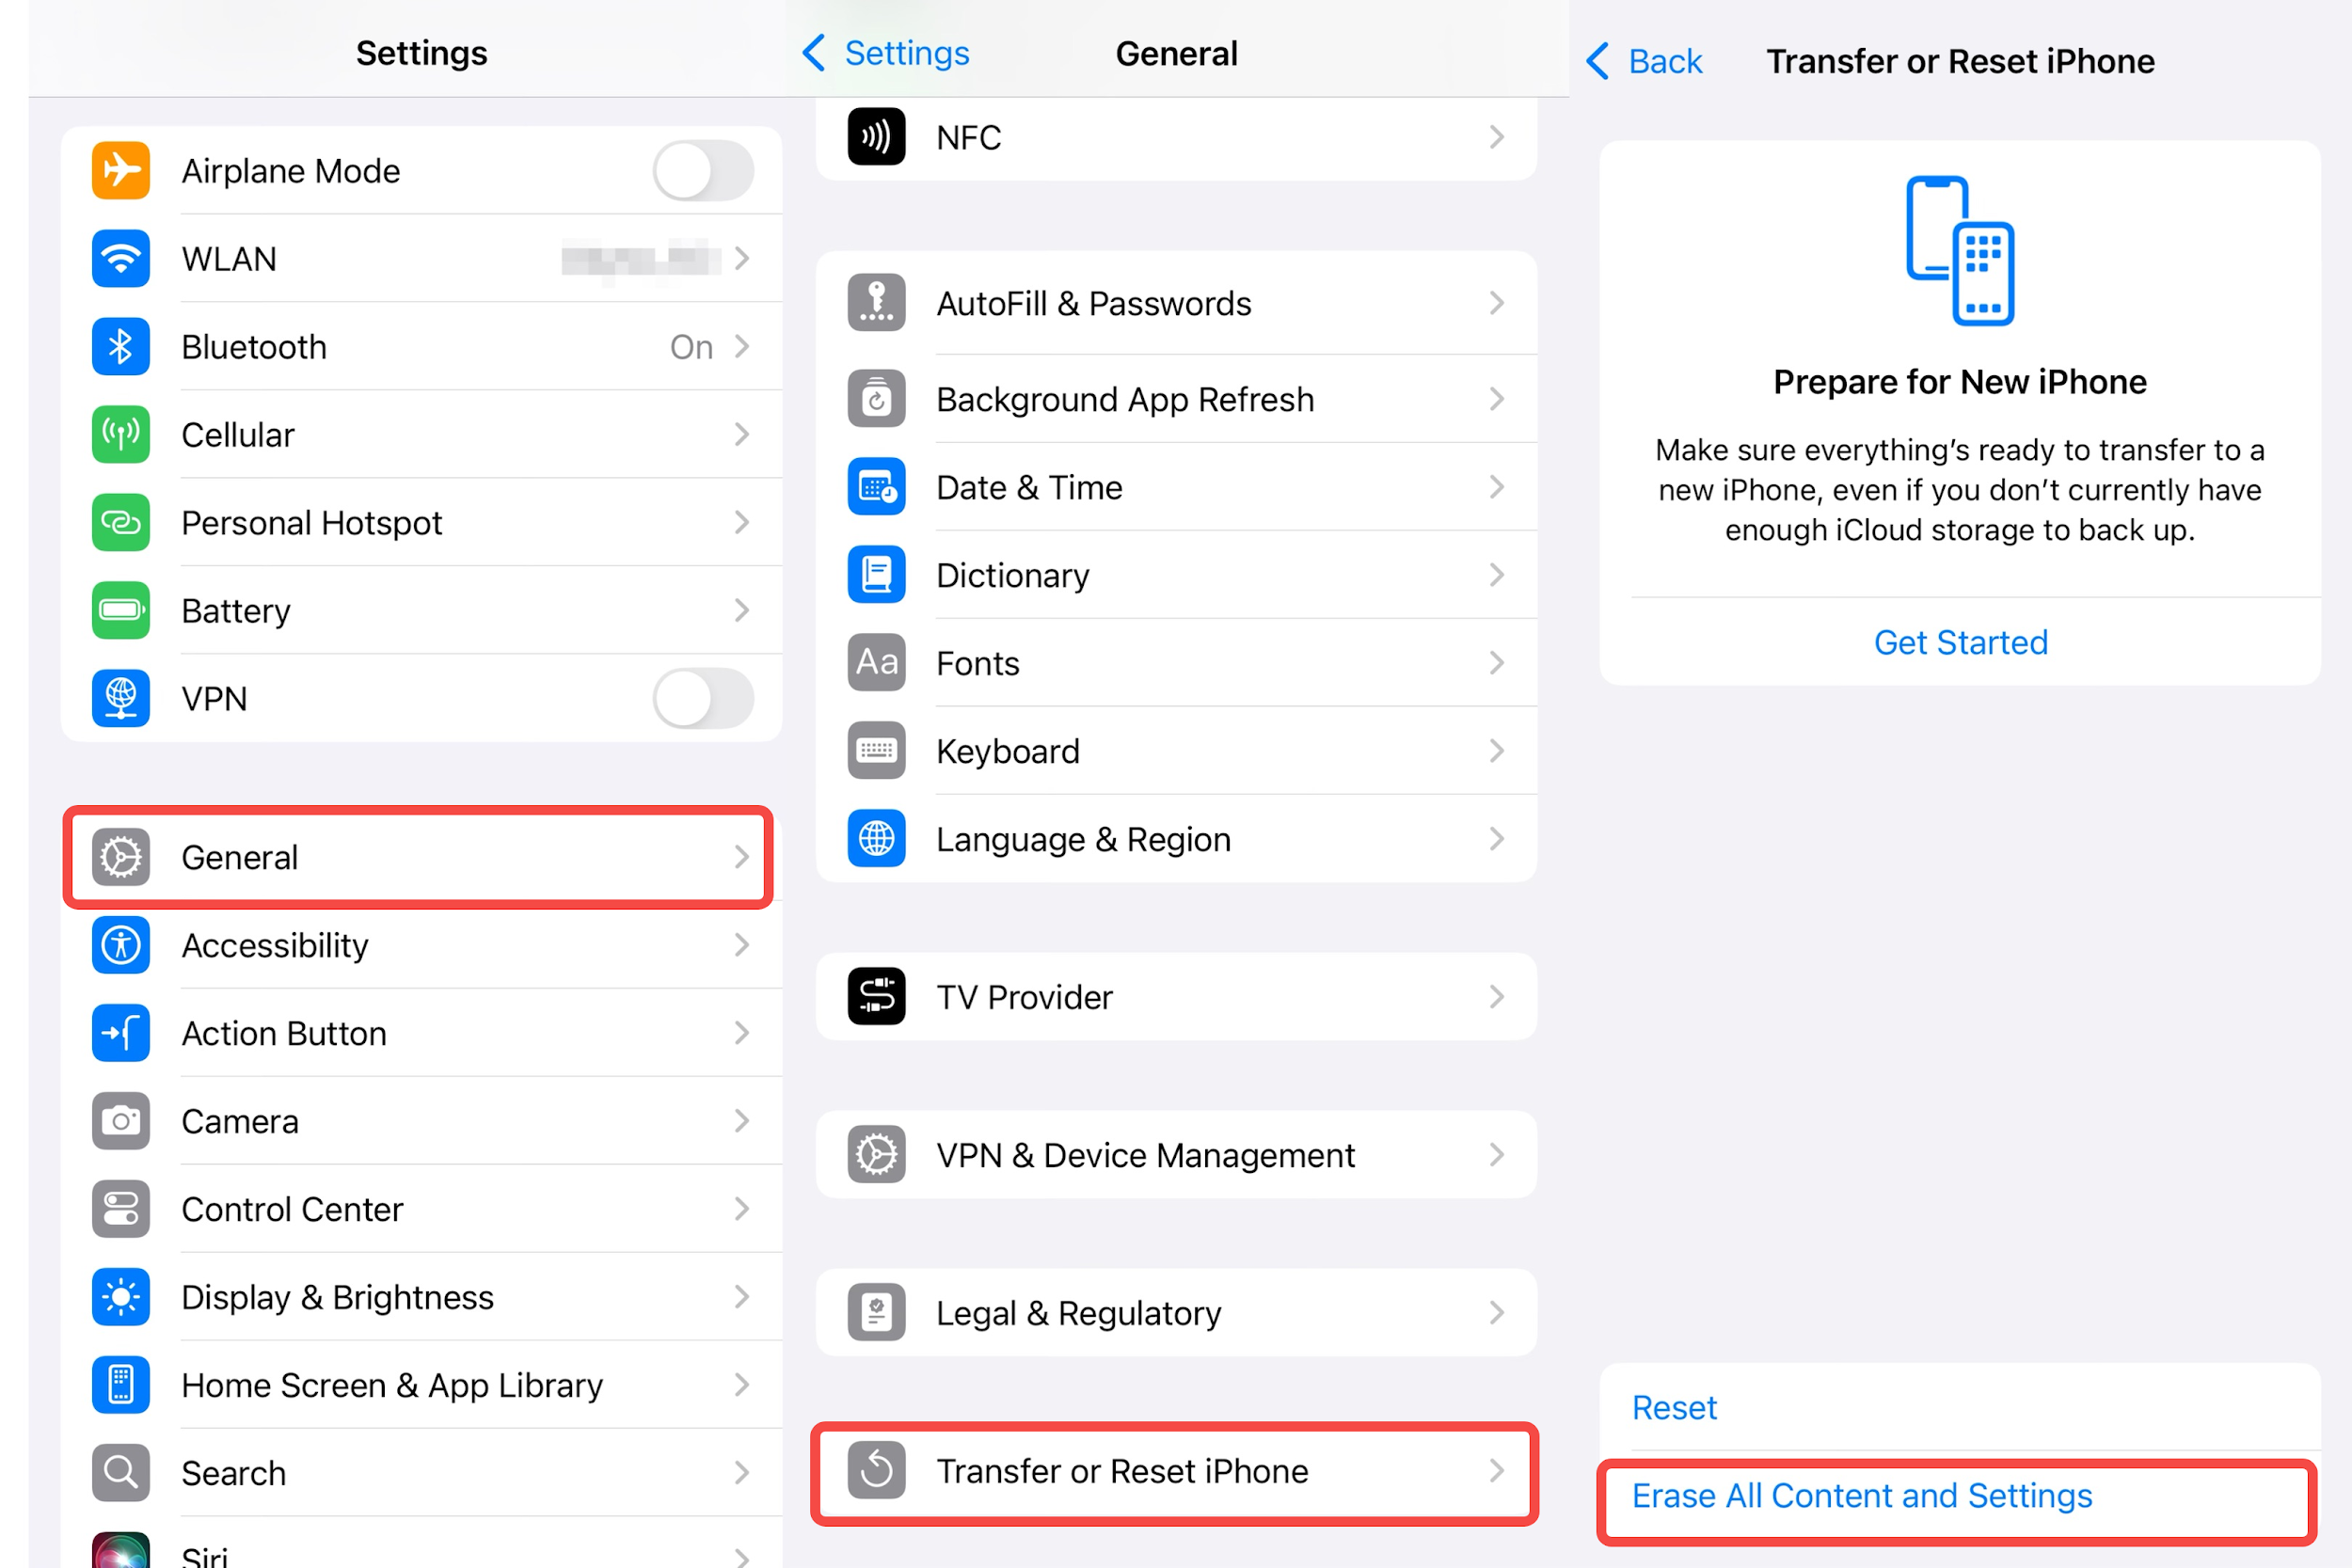
- Confirm Backup Availability: Navigate to Settings > [Your Name] > iCloud > Manage Account Storage > Backups. Verify the dates of your available backups to ensure you have a suitable one.
- Wipe iPhone Data: Proceed to Settings > General > Transfer or Reset iPhone > Erase All Content and Settings. Confirm this action.
- Restore During Setup: During your iPhone’s initial setup phase (after the erase), choose “Restore from iCloud Backup.” Sign in with your Apple ID and select the most relevant backup from your list.
- Allow Process to Complete: Permit your iPhone to finish the restoration. Once complete, your videos (along with other data) from that backup’s date should reappear. This strategy is also applicable to recover erased photos.
/wp:list-item
wp:list-item
/wp:list-item
wp:list-item
/wp:list-item
wp:list-item
/wp:list-item
/wp:list
wp:image {“id”:54812,”width”:”700px”,”sizeSlug”:”full”,”linkDestination”:”media”,”align”:”center”}
/wp:image
wp:heading {“level”:3}
Steps to Restore from iTunes/Finder Backup:
/wp:heading
wp:list {“ordered”:true}
- wp:list-item
- Connect Device: Connect your iPhone to the computer containing your backups using a USB cable.
- Open Backup Software: Launch iTunes (for Windows or older macOS versions) or Finder (for macOS Catalina and newer).
- Select Your iPhone: Choose your iPhone when it appears within the application’s sidebar.
- Initiate Backup Restore: In the Summary or General tab, click “Restore Backup.”
- Choose & Execute: From the dropdown menu, select the appropriate backup. Click Restore and await the completion of the process.
/wp:list-item
wp:list-item
/wp:list-item
wp:list-item
/wp:list-item
wp:list-item
/wp:list-item
wp:list-item
/wp:list-item
/wp:list
wp:paragraph
This method is effective for users who maintain consistent local backups. However, it requires a complete data replacement on your device.
/wp:paragraph
wp:heading
Method 4: Consider a Professional Data Recovery Service
/wp:heading
wp:paragraph
On very rare and extreme occasions, like when your iPhone is physically broken or when all software-based solutions fail, hiring a professional data recovery service might be your only option.
/wp:paragraph
wp:paragraph
These services work in regulated settings, such as cleanrooms, and make use of specialist equipment. They can try to directly recover lost data from hardware parts that have been corrupted or damaged.
/wp:paragraph
wp:heading {“level”:3}
Important Considerations:
/wp:heading
wp:list
- wp:list-item
- Cost Implications: These specialized services are typically very expensive.
- No Guarantee: There is no absolute guarantee of successful data recovery. The process itself can, in rare instances, lead to further device damage.
- Data Privacy: Prioritize choosing a reputable service with robust data privacy and security protocols.
/wp:list-item
wp:list-item
/wp:list-item
wp:list-item
/wp:list-item
/wp:list
wp:paragraph
This option should only be pursued for irreplaceable data in severe situations where all other avenues have been exhausted. This method is relatively expensive in terms of cost and is not as economical as the previous methods (such as scanning by a iPhone data recovery software and restore from backup).
/wp:paragraph
wp:heading
Method 5: Retrieve from Sent Messages or Shared Copies
/wp:heading
wp:paragraph
If you shared the video before deletion, copies may exist in messaging apps, emails, or synced devices. This method bypasses iPhone storage entirely by leveraging distributed copies of the video.
/wp:paragraph
wp:heading {“level”:3}
Steps to Recover:
/wp:heading
wp:list {“ordered”:true}
- wp:list-item
- Check Messaging Apps: wp:list
- wp:list-item
- Open iMessage, WhatsApp, Telegram, etc.
- Navigate to “Sent” folders or specific chats where you shared the video.
- Tap and hold the video → Select “Save” or “Download“.
/wp:list-item
wp:list-item/wp:list-item
wp:list-item/wp:list-item
/wp:list
- Review Email Attachments: wp:list
- wp:list-item
- Search your email client (Gmail, Outlook, etc.) for messages containing the video.
- Look in “Sent Mail” or “All Mail” folders.
- Re-download attachments to your device or computer.
/wp:list-item
wp:list-item/wp:list-item
wp:list-item/wp:list-item
/wp:list
- Inspect Synced Apple Devices: wp:list
- wp:list-item
- If you AirDropped the video to a Mac/iPad, check the Downloads folder.
- For iCloud Photos users, verify if the video exists on other signed-in devices (if deletion hasn’t synced).
/wp:list-item
wp:list-item/wp:list-item
/wp:list
/wp:list-item
wp:list-item
/wp:list-item
wp:list-item
/wp:list-item
/wp:list
wp:heading
Summary Tables for All Methods
/wp:heading
wp:table
| Method | Ease | Key Strength | Pros | Cons |
| 1. Specialized Software (Gbyte Recovery) | ⭐⭐⭐⭐⭐ (Easy) | Deep scans for fragmented data | • No data overwrite• Selective recovery• Previews files | • Paid tools |
| 2. iCloud/iTunes Backup Restore | ⭐⭐⭐ (Moderate) | Complete device-state recovery | • Official Apple method• Recovers all data | • Overwrites current data• Backup age-critical |
| 3. Cloud Sync Services | ⭐⭐⭐⭐ (Easy) | Leverages existing cloud workflows | • Free• Quick access to trash folders | • Requires prior sync setup• Limited retention period |
| 4. Professional Service | ⭐⭐ (Hard) | Recovers from physical damage | • Last resort for hardware issues | • Very expensive• Privacy risks |
| 5. Sent Messages/Shared Copies | ⭐⭐⭐⭐⭐ (Easy) | Uses distributed copies outside the iPhone | • Instant & free• No software needed | • Requires pre-deletion sharing• Quality loss possible |
/wp:table
wp:heading
Conclusion
/wp:heading
wp:paragraph
Losing iPhone videos is incredibly stressful, but recovery is possible. For your best chance, start immediately with specialized software like Gbyte Recovery – its deep scanning retrieves videos even beyond the “Recently Deleted” album without overwriting data.
/wp:paragraph
wp:paragraph
If unsuccessful, explore iCloud/iTunes backups cautiously. Act fast, and enable auto-backups/iCloud Photos to safeguard future memories.
/wp:paragraph