If you are finding difficulties in your current hosting company or want to migrate your WordPress website to a reliable hosting, you are landed at right place.
In share hosting services there are many websites are hosted on a single node, which you never aware of. If your neighbor is bad that affects you, likewise on share hosting if there are spam websites hosted then its impacts your website as well.
Even my website SEO also gets impacted; previously I had taken service from one of the SEO Company in Bangalore but they asked me to switch to Amazon AWS Service to getter better SEO results.
This article is all about how to host a WordPress website in Amazon AWS LightSail without taking help of anyone. Here I will be demonstrating step-by-step process to accomplish the goal, so keep reading till the end.
Let’s assume you recent bought a domain from Godaddy i.e. which12order.com and want to build a WordPress website on this domain.
Our approach of building a WordPress website is bit different from traditional way of building WordPress websites using cPanels and One Click Installations.
For hosting a WordPress website, we will be using Amazon AWS Hosting Solution. Amazon don’t provide all the required components needed for setting up a website. It only provides the platform, where you need to build everything from scratch.
So people finds bit difficulties to setup their websites on Amazon AWS Cloud. But here I have simplified the process and described each step in detail, so that any person can build a WordPress Website on Amazon Clould.
If you are new to Amazon AWS Cloud Services, please follow each step carefully while building a new machine.
Step1: Register with Amazon AWS
You are required to create an account with Amazon AWS to avail its services. Account creation process is very simple and easy but you need a credit card or debit card. They will validate your credit card or debit card by deducting below $1 and later they charge back to the same card.
Amazon AWS Cloud Services in not FREE, so they will charge your registered credit or debit card on monthly basis depending on usage.
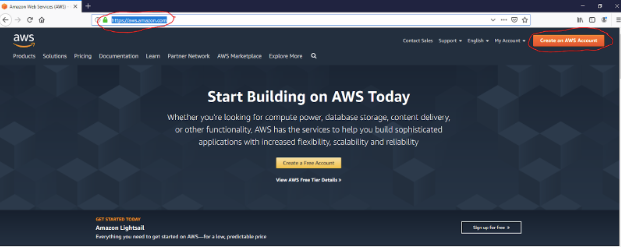
Type https://aws.amazon.com on your web browser; Click on “Create an AWS Account” and fill the forms.
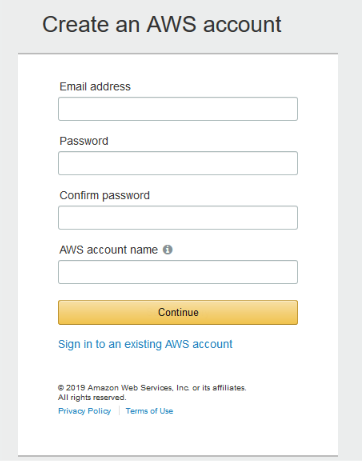 The process of Amazon AWS account creation is very simple and easy. Once you create account, you need to add payment type (Credit Card or Debit Card).
Upon validation, it takes 24hrs or less to enable your account to create Amazon AWS Instances.
I have not added all the steps of account creation process because it’s very simple and easy to do it.
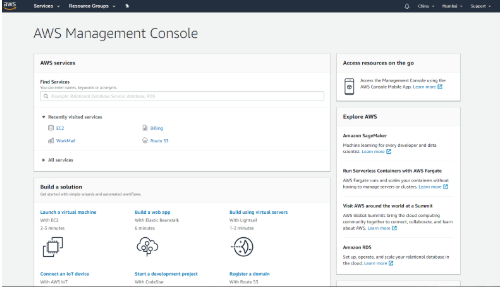
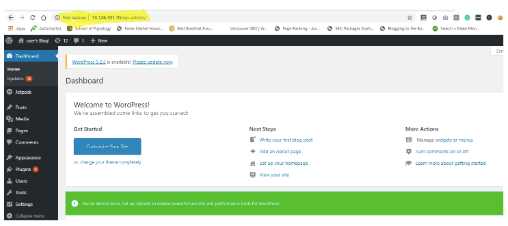
Once your account is setup perfectly, upon login to your account, the Amazon AWS Dashboard looks like this;
Step2: Exploring Amazon AWS LightSail
Amazon EC2 Services are more preferred to create instances but Amazon Lightsail is a simplified platform to create a virtual machine on Amazon Cloud.
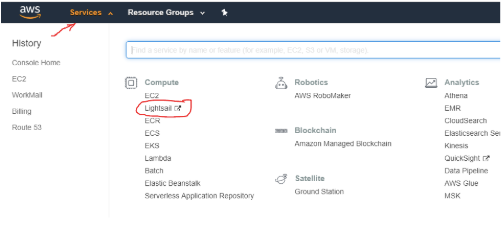
Next step is to create machines on AWS LightSail, to do that, you need click on “Services” drop down menu and select LighSail.
Amazon LightSail is a pre-defined and hassle free platform where anyone can build machines without having knowledge of it.
Amazon Lightsail platform is very simple and easy to use.
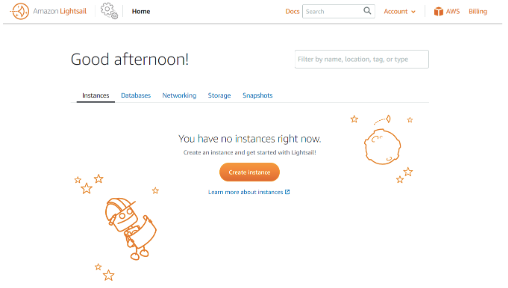
Step3: Creating Machine using Amazon Lightsail
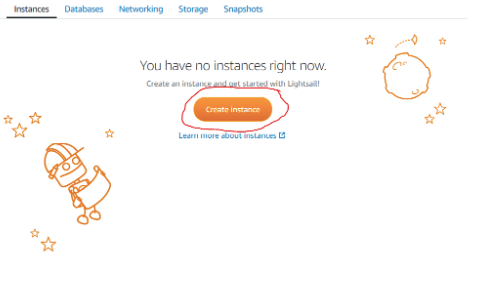
Click on “Create instance” under Instances menu on home page dashboard to initiate machine-building process.
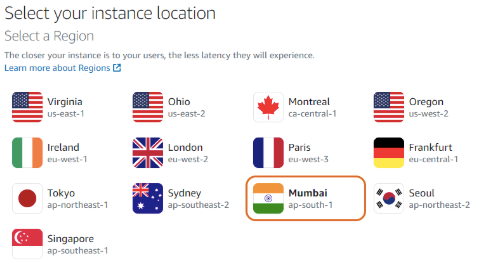
Select your instance location; you need to identify the location based on your customer base. If your website is meant to serve Indian users, then you should select “Mumbai”, which is part of India. Basically it’s going host your machine on that particular location of Amazon DataCenter.
Here I have selected “Mumbai” instant location.
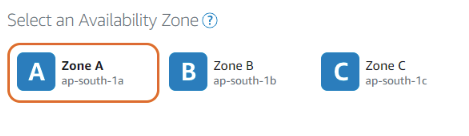
Select an availability Zone, let it be default.
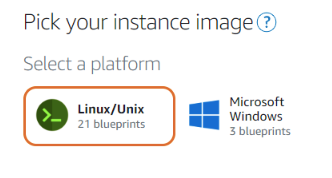
 Depending upon your requirements you can select the OS type, here we are selecting Linux OS. Because in Windows OS there is no provision of getting WordPress.
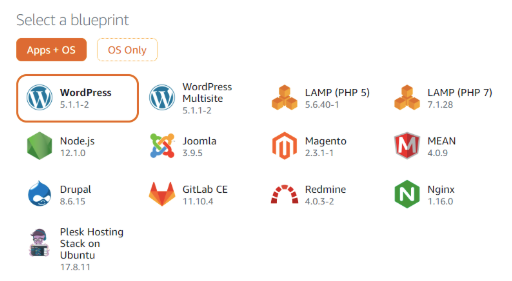
Under “Select a blueprint” category, you have two options Apps + OS and OS only. If you select OS only then manually all the required applications need to be installed, which is very time consuming and cumbersome process. Select Apps + OS to have instant readily available platform.
Out of many available apps, I have selected WordPress, because we want our site to be hosted on WordPress. This is an inbuilt WordPress application certified by Bitnami.
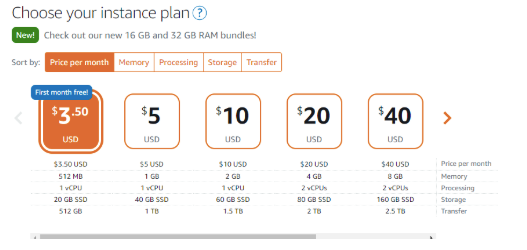
Depending upon your requirements and budget, you need to select the below plans. I have selected $3.50 per month plan, which is free for first month.
To identify your machine, you need to provide a name to the instance. I have given “which12order” as per my domain name.
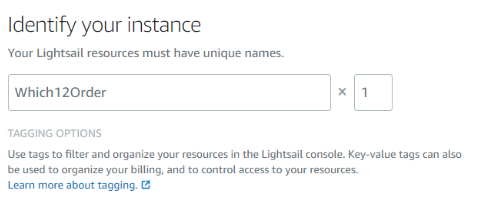
Finally click on “Create Instance” to initiate the installation process.

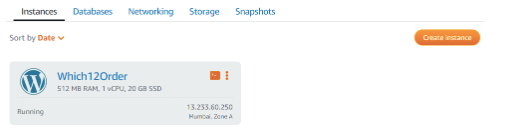
While the installation process is going on, the status will show as “Pending” and latter “Running”.
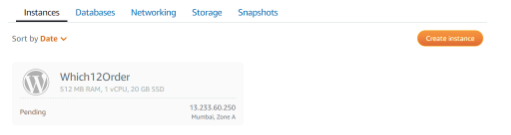
We have successfully build the machines in AWS Cloud. In next steps we will configure the machine.
Step4: Configure Newly Created Machine
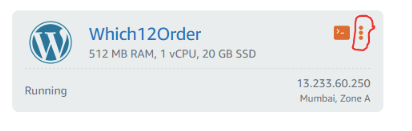
To manage this newly created machines, you need to click on three orange color dots and select “manage”.
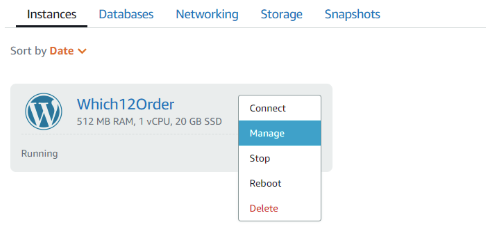
From the instance management dashboard, you can see all the properties of the machine. You can manage everything from this console.
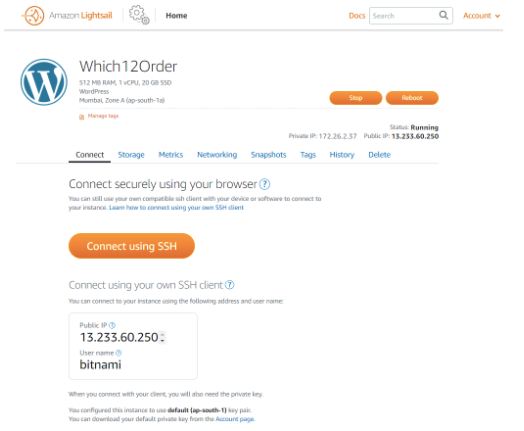
Lets talk each of the menus and other associated properties. If you look at the top, you can see the machine name and the details configuration of the machine i.e. this machine runs on a 512 MB RAM, 1 vCPU, 20GB SSD, WordPress Application, Mumbai Zone A.
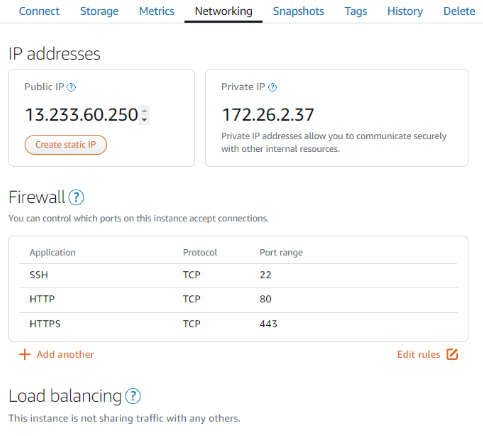
The machine’s private ip address is 172.26.2.37 and public ip address is 13.233.60.250
This machine can be accessible from public network using this ip address 13.233.60.250
Lets discuss about the 8 available menu’s and its usage.

Connect Menu helps to access the root console of the machine. If you want to make any changes on the OS part, then you need to SSH to the machine.
This is web based ssh, so you no need to install Putty to access the machine. Just click on “Connect using SSH’, it will show you the root console as like below;

In this machine WordPress is already pre-installed but we don’t know the password to login WordPress Console. The default user name for login to WordPress console is “user”.
Let me show you how to get the WordPress password.
Once you login root, type “cat bitnami_application_password” and it will display the password.

Let’s check if we are able to login to WordPress using these credentials. You need to enter public ip i.e. 13.233.60.250/admin to get WordPress login window.
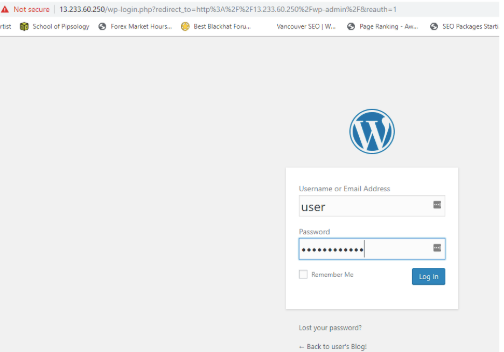
Now I am successfully logged into the WordPress console, using the credentials.
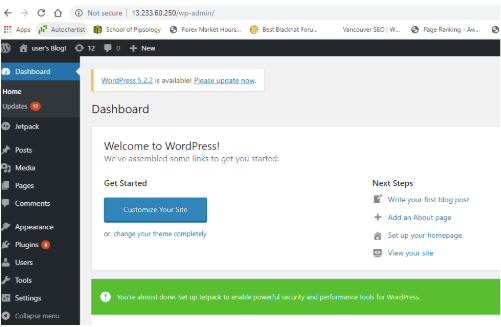
Latter part of this article I will show the WordPress basic configurations. Now let’s talk about other available menus.
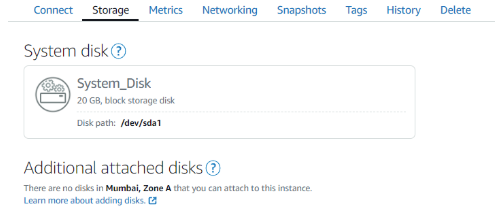
Storage menu shows the currently allocated disk and you can add more disk if needed.
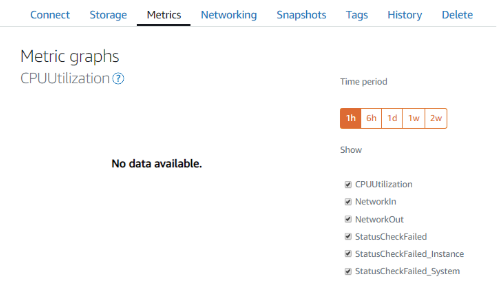
Metrix menu helps in monitoring the machine activities i.e. CPU, Memory, Disk and Network utilizations. Using this menu you can monitor your machine, if required you can increase the required resources depending upon its utilizations.
Networking menu is used for managing network resources like network ports allow or block, load balancing and creating a public static ip.
When you create a new machine, a dynamic public ip is assigned, which will change whenever you reboot your machine. So it’s advisable to have a static ip which will never change.
But static public ip is always chargeable. You can check amazon price details at https://calculator.s3.amazonaws.com/index.html
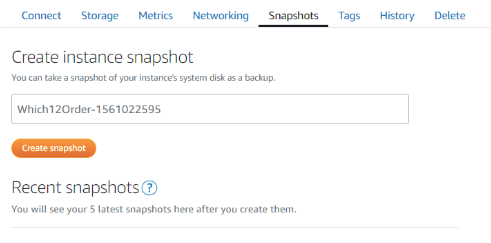
Snapshots menu helps in creating snapshots in case if you need to upgrade or install any applications. Snapshots means, it creates time stamp backup. It is used if you are either upgrading the OS or installing a new application. In case it fails, you can always have the option to go back to previous day and restore it.
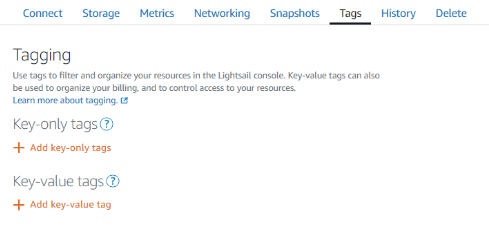
Tag menu used to create tags for instances. It helps in organizing the resources and billing.
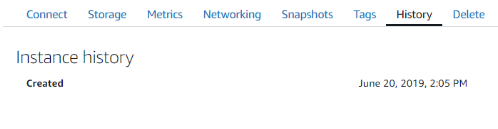
 History menu records all the activities that you have performed on this instance.
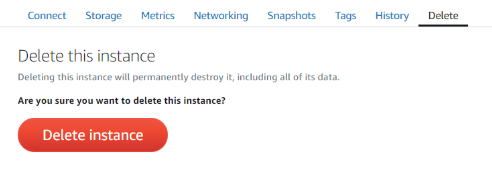
Delete menu removes the instance permanents from Amazon AWS Cloud including the data. So you cannot revert back once machine deleted. Be careful while deleting any instances from AWS Cloud.
Step5: Configure AWS Network and DNS Zone
To access the machine from outside network i.e. public network, you must configure the network. Else you cannot point your domain to this machine. Let’s configure the network.
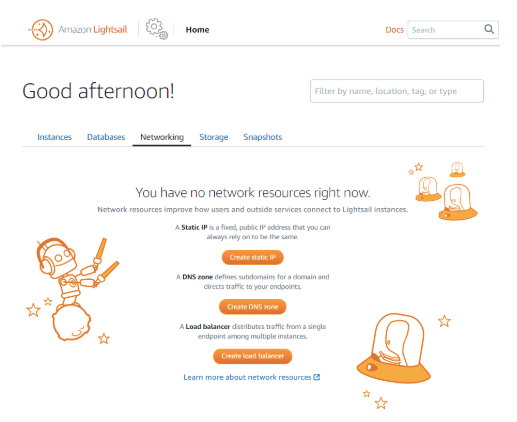 Go back to Amazon Lightsail home dashboard and click on Networking menu.
Above picture says “You have no network resources right now.”, which means currently you have not configured the Static Public IP, DNS Zone and load balancer.
At the moment, we don’t need a load balancer but Static IP and DNS Zone is very much required.
Lets create a static ip address, to do that click on “Create Static IP” and select an instance from the drop down menu and give a name to the static public ip.
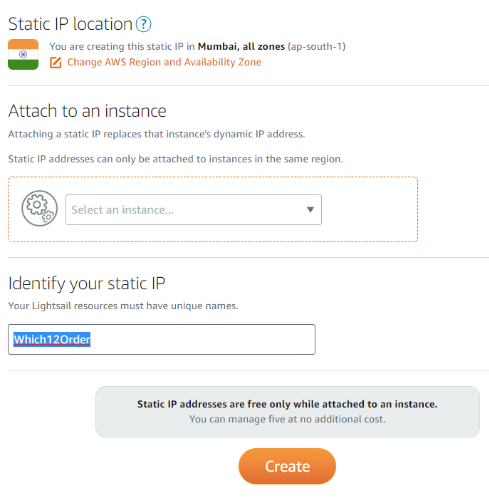 Once all the options are selected, click on ‘Create” to create a static public ip address for your machine. Now you have a new static public ip address created and assigned it to the machine. This is a static ip and it will never change whenever you reboot the machine but its chargeable.
The 13.126.101.10 is your new static public ip address for this machine.
We have successfully created a Static IP address for this machine. Lets now create a DNS Zone, which will help the your registered domain i.e. which12order.com website to point this machine.
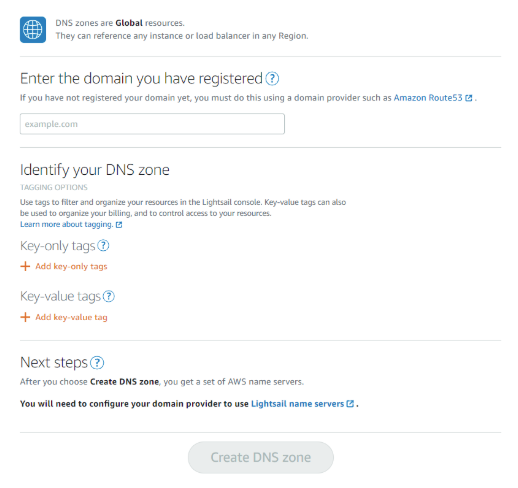 Click on “Create DNS Zone” to start the process;
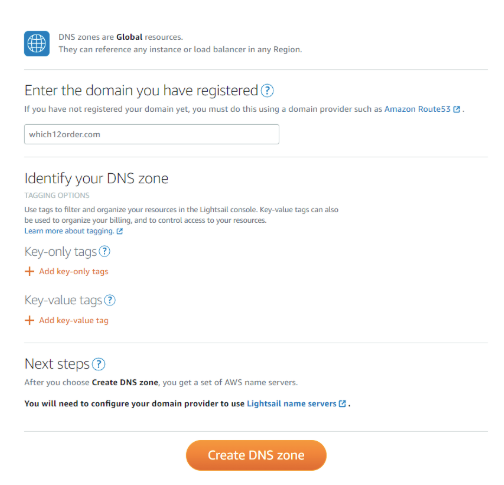 Replace the “example.com” with your domain name i.e. which12order.com
Click on “Create DNS Zone” to initiate the process. Now the DNS Names Server are successfully created.
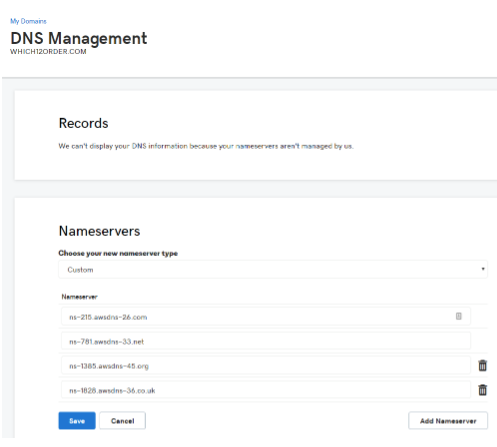
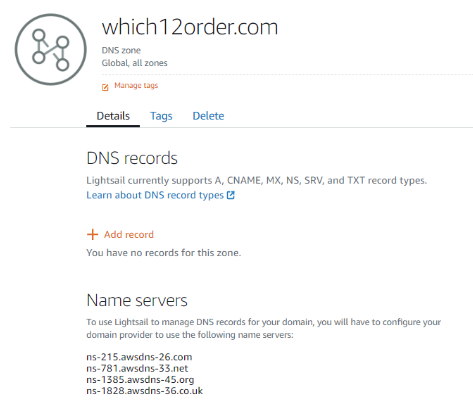 Now login to your Godaddy account and update the DNS information.
We have successfully configured the networking part and updated the DNS Servers on Godaddy. Now the which12order.com is pointing to this server. If its new domain then it will take 24hours to replicate.
Till the time it takes for syncing, you can access the website using the static public ip address i.e. 13.126.101.10
Type 13.126.101.10/admin or 13.126.101.10/wp-admin on web browser to login to WordPress.
 Now the WordPress Website is ready to use. Install a new theme and plugins to configure the WordPress Site.
If you have existing website, you can migrate it using a simple plugin called WP All in One Migration. It’s a very popular plugin and it makes life very easy.
I have been providing SEO Services, since last one decade and when you build your website on Amazon AWS Cloud, your website ranking possibilities are more than those websites which are hosted on shared host.
Amazon hosting is more reliable and secure but the only problem is the costing. They don’t have any fixed price for any services, their charges are based on utilization of the resources.
If you are planning host your website on Amazon cloud, check their prices of each resources.
If you feel this article is helpful to you, please don’t forget to share it with your friends.