Backup is one of the major reasons why most people go for iOS instead of Android. Once enabled, you stay sure of the fact that your data is safe. Even if you have to shift your phones once in a while — or, the worst case, lose one —, you wouldn’t be in trouble. That having said, the process isn’t that easy, since backup iPhone to iCloud problems are there. You may come across some issues in-between.
Don’t worry, though. You can easily fix all these issues and keep rocking with your iPhone or iPad. This article will help you do that, quite effectively. It will cover the three ways to backup iPhone, to iCloud and to your computer. So, even if something goes bad with iCloud recovery, you will have something else to rely on. Shall we get into the tutorial, then?
Method #1 Backup iPhone to iCloud — The Official Way
Suppose you have a brand-new iPhone RED with you. As long as it comes with iOS pre-loaded, it has one of the best ways of data backup and restoring — backup iPhone to iCloud. Multi-device availability, central control etc. are some of its features. The notable thing here is that you need an internet connection — with high speed — to back up or restore the content using the servers. Another point is that iCloud restricts storage space to 5GB, which may/may not be enough.
Now that you have an idea, we will check out the steps.
- If you just bought the iPhone RED, you will have to connect your Apple ID with the device. If you do not have one, create one.
- Open your device and go to Settings. From the menu, choose iCloud
- From the upcoming window, you have to choose Backup
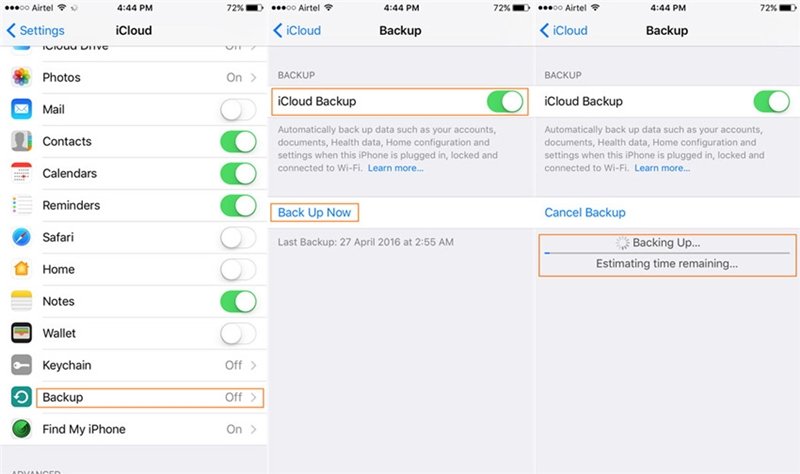
- In the next screen, you can see a toggle button. Click the button to turn on iCloud Backup. Normally, it may take some time for the backup process to start.
- Click on the Back Up Now button if you want the process to start instantly.
That’s all folks. Almost everything in your device will be backed up and will be kept in sync with iCloud. Pretty simple, isn’t it?
Method #2 Backup iPhone to Computer — Via iTunes
This method is also official, but more safe, if you ask us. In this method, we are going to transfer the iPhone data to your computer, using iTunes client. iTunes is available for both Windows and Mac. In case of Mac, it will come pre-installed, meaning that you don’t have to install it. But the steps for backing up iPhone to PC or Mac via iTunes will be the same.
Let’s now move onto the steps, shall we?
- If you are using Windows PC, download the latest version of iTunes from the official Apple website. In the case of Mac, you can simply update the version to the latest.
- You have to connect your iPhone RED to your computer via USB. If it’s the first time, iTunes may take a few seconds to detect the device. Once detected, you can see it on the interface.
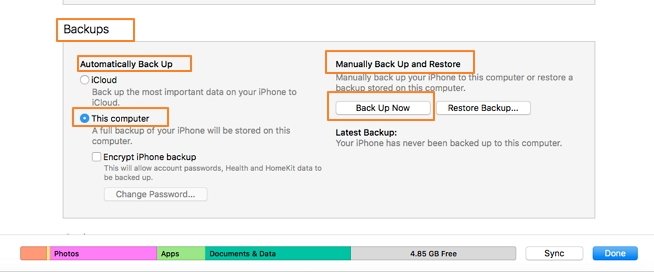
- Now, from available devices, choose iPhone
- From the Summary tab you can see on the left side, choose Backup
- You can click on the Back Up Now button in order to start the process.
As you can see, there are some related options too. For instance, you can set up iTunes to backup iPhone to iCloud or the computer whenever you connect it. Some people don’t find the manual backup option to be a convenient one. If that’s the case, you can go for Automated Backup, which works in only a second. If you’re someone who uses iTunes very often, we’d recommend enabling Automated Backup.
There is also a method to do iPhone to iTunes backup via Wi-Fi. However, it isn’t technically backup, but one form of content sync. So, we would not recommend that if you are looking for a traditional backup.
Method #3 Backup iPhone to Computer using dr.fone Backup & Restore
dr.fone Backup & Restore is a third-party tool that lets you back up your iPhone without losing anything. In case of your new iPhone RED too, you can use this method. In case you didn’t know, dr.foneis a collection of multiple utilities for managing your iPhone and other iOS devices with better features. However, in this step, we will be using the options for Backup and Restore only. Without further ado, we will get into the easy steps to do that.
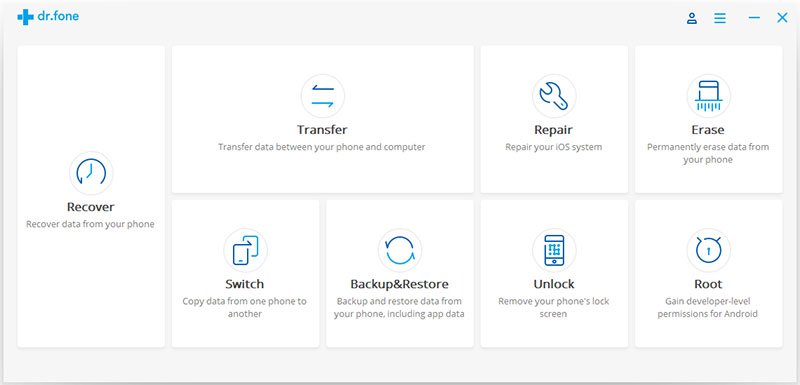
- In order to proceed, you have to download dr.fone Backup & Restore and install it on your computer. It is available for both Mac and Windows. Once the installation is done, you can see the main UI. In it, click on the Backup & Restore tile to proceed further.
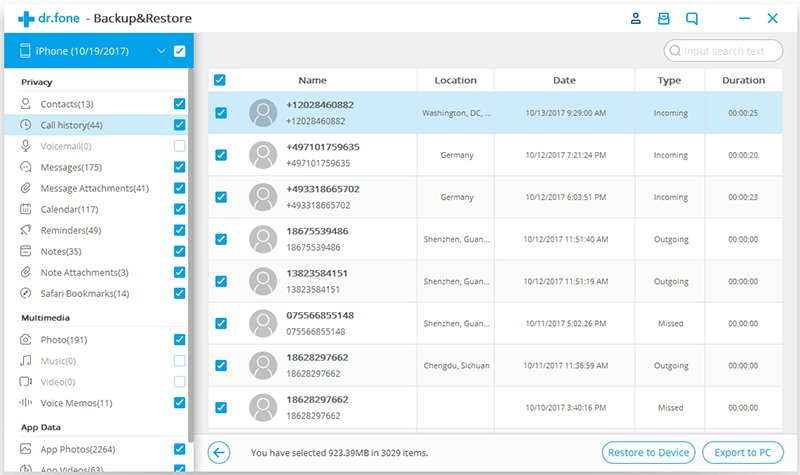
- In the next screen, you can decide which all data needs to be backed up to the computer. This is one of the awesome features in dr.fone Backup & Restore when compared to the process to backup iPhone to iCloud. You can decide which of your data is being backup and which is not.
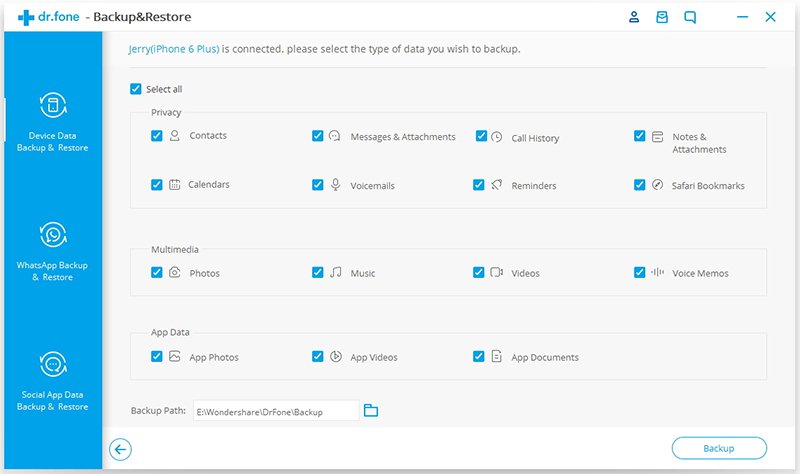
- Wait for a few seconds while dr.fone Backup & Restore backs up your data and shows you the list of data. You can also see the number of files, if any.

- Wait for the next screen where you can preview the backup. If you want to access some of the data that you just backed up, this feature would come in handy.
As we said earlier, when you want to backup iPhone to iCloud, dr.fone Backup & Restore can be a way better option for everyone. You have more control over the backup process; for instance, if you don’t want to back up some files, you can decide not to. Sounds awesome, doesn’t it? And, it all comes down through a highly useful tool.
To Sum Up
So, these are some of the best ways to backup iPhone to iCloud and computer. The question is whether you need better control over the back-up process. In that case, we would recommend the offline backup option using dr.fone Backup & Restore, which is intuitive too. Altogether, we’d recommend the third option, since it provides better safety, given that you can store the backup at multiple safe locations.

